Sweetapolita's Jumbo Frosted Animal Cookies
 Spring is in the air! Sunshine, warm (-er) breezes, new produce, longer days (sort of great because of that aforementioned sunshine and warmth, sort of not because I have a two-year-old who wakes up when it's still dark and sprints like Usian Bolt all day, so come 3:30 p.m., I'm seeing Care Bears). It's also a season that brings with it lots of new inspiration in the kitchen, and a chance to start baking with fun new ingredients and sweet splashes of color, a welcome change after a long season of golden brown comfort baking (not that there's anything wrong with that, of course).
That color could be fresh seasonal fruits, but it could also be the kind of color that makes you feel like a real artist while baking, using all kinds of edible paints and adorable decors, something I don't get to do nearly enough of these days. When a book lands on your doorstep that makes you want to sprinkle-toss and bust out the gel food colorings and more or less become a much more Pinteresting version of yourself, you know you've struck cookbook gold.
Or should I say BAKEBOOK? Good grief, even the title of The Sweetapolita Bakebook lets you know right off the bat that this isn't your typical recipe collection. And then of course there are the photos--THE PHOTOS! Gah. It's all such a vision in gumpaste and disco dust. And it's release is just around the corner on April 7th! But let me back up a bit.
I first met Rosie Alyea (of the extraordinary blog Sweetapolita) as a "blogger friend", after admiring her work and iconic photographs of glorious cakes (hello, asparagus cake that launched a thousand imitators). Even though I'm more of a dreamer than a doer when it comes to the kind of awe-inspiring confections that Rosie designs and bakes, we chatted a bit and found we had so much in common--namely the crazy balancing act of motherhood while pursuing creative projects in the name of all things sweet. We finally met face-to-face in San Francisco over pastries last year; Rosie, a blonde vision in white and denim, and me, a sweaty, 8-weeks-post-partum disaster with a fussy infant strapped to my chest. But we clicked, and we've been friends ever since, cheering each other on through our respective cookbook manuscripts and in life in general. She's a gem, both as a friend and as a confection designer and cookbook writer. Sound like a I have a girl crush? WELL-I-DO-SO-WHATEVER.

As it turns out, her amazing first foray into cookbook making (the first of many, I am sure) seals the deal--this chick isn't getting rid of me anytime soon. I need to ride her coattails all the way to fondant-draped success and have her teach me her ways. I already have mentally bookmarked several of her jaw-dropping creations for upcoming celebrations. But for the time being, I opted for a simpler recipe that's perfect for Easter and to help her celebrate the release of what is truly a triumph of a cookbook. From the recipes to the photos to the layout and design, this book is a must-have on any baker's shelf who wants to up his or her game, and be endlessly inspired by the possibilities when it comes to dreaming up showstopping desserts.
When you're not totally blinded by the sheer beauty of the visuals in this book, what you'll find is a whole lot of soulful whimsy. Rosie describes the book as "Miette at the Circus", and that couldn't be more on point. This book is about recalling the kinds of treats from childhood that made your eyes wide with wonder, and then giving them a stylish, next-level makeover to make them into truly modern treats.
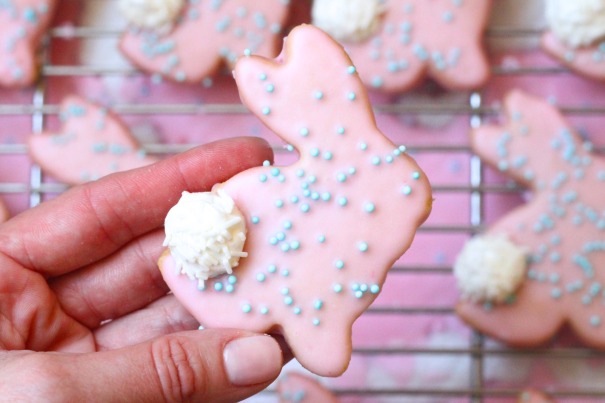
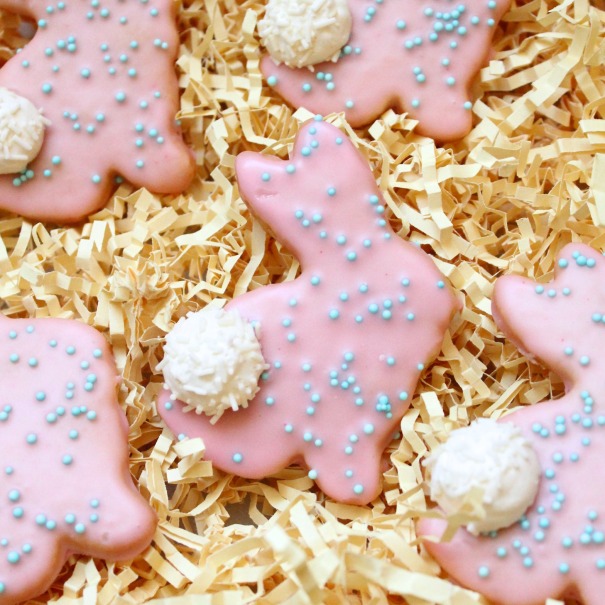
Take this spin on frosted animal cookies, those crunchy, sweet, bubblegum pink-coated, nonpareil-spangled wonders that still exist on grocery store shelves. You don't want to catch me alone with an open bag of them--it's not cute. But given the chance to make a homemade version, I felt like I was elevating my binging tendencies ever-so-slightly, on top of getting to do one of my favorite things: go treasure hunting at a baking supply store for a sweet little bunny-shaped cutter, new sprinkles, and a slightly obscure ingredient called baker's ammonia that makes all the difference in these crave-worthy, almost-too-pretty-to eat cookies.
But of course, we ate them all.
This fantastic recipe is from Rosie’s new book The Sweetapolita Bakebook, which comes out next Tuesday, April 7th--hooray! In addition to wanting to publicly praise my amazing friend for her work, I’m also writing this gushing post as part of the The Sweetapolita Bakebook Blog Hop. All this week, Rosie is posting clues to a number of great blogs where you can find her recipes hidden. When you find one, you can enter to win a fabulous prize on Rosie's site! So now that you’ve found me, check out www.sweetapolita.com for the full list of prizes and all the official rules to enter! And now for that recipe....
Jumbo Frosted Animal Cookies Reprinted with permission from The Sweetapolita Bakebook, courtesy of Rosie Alyea and Clarkson Potter
Just a couple notes: I was pumped to try baker's ammonia for this recipe, an old fashioned evening agent that creates really crisp cookies. But if you can’t get baker’s ammonia for this recipe, you can substitute ½ teaspoon baking powder and ½ teaspoon baking soda, added along with the dry ingredients. If you do find baker's ammonia, however, be aware that it might cause a slightly funky chemical smell during baking, but it will soon disappear and feel an unbeatably crisp cookie behind.
A little kitchen MacGyvering: I made oat flour in a food processor by grinding old-fashioned rolled oats to a powder, then immediately used the processor again to grind granulated white sugar to make superfine sugar, which helps give the cookies their fine, crisp texture.
I used the Confectioners' Glaze as listed in the recipe and it was absolutely delicious, but next time I might try the Confectioners' Coating version of the glaze by whisking in a little melted candy wafer coating, just for fun, and to give these frosted animal cookies a covering that's more reminiscent of the store-bought originals.
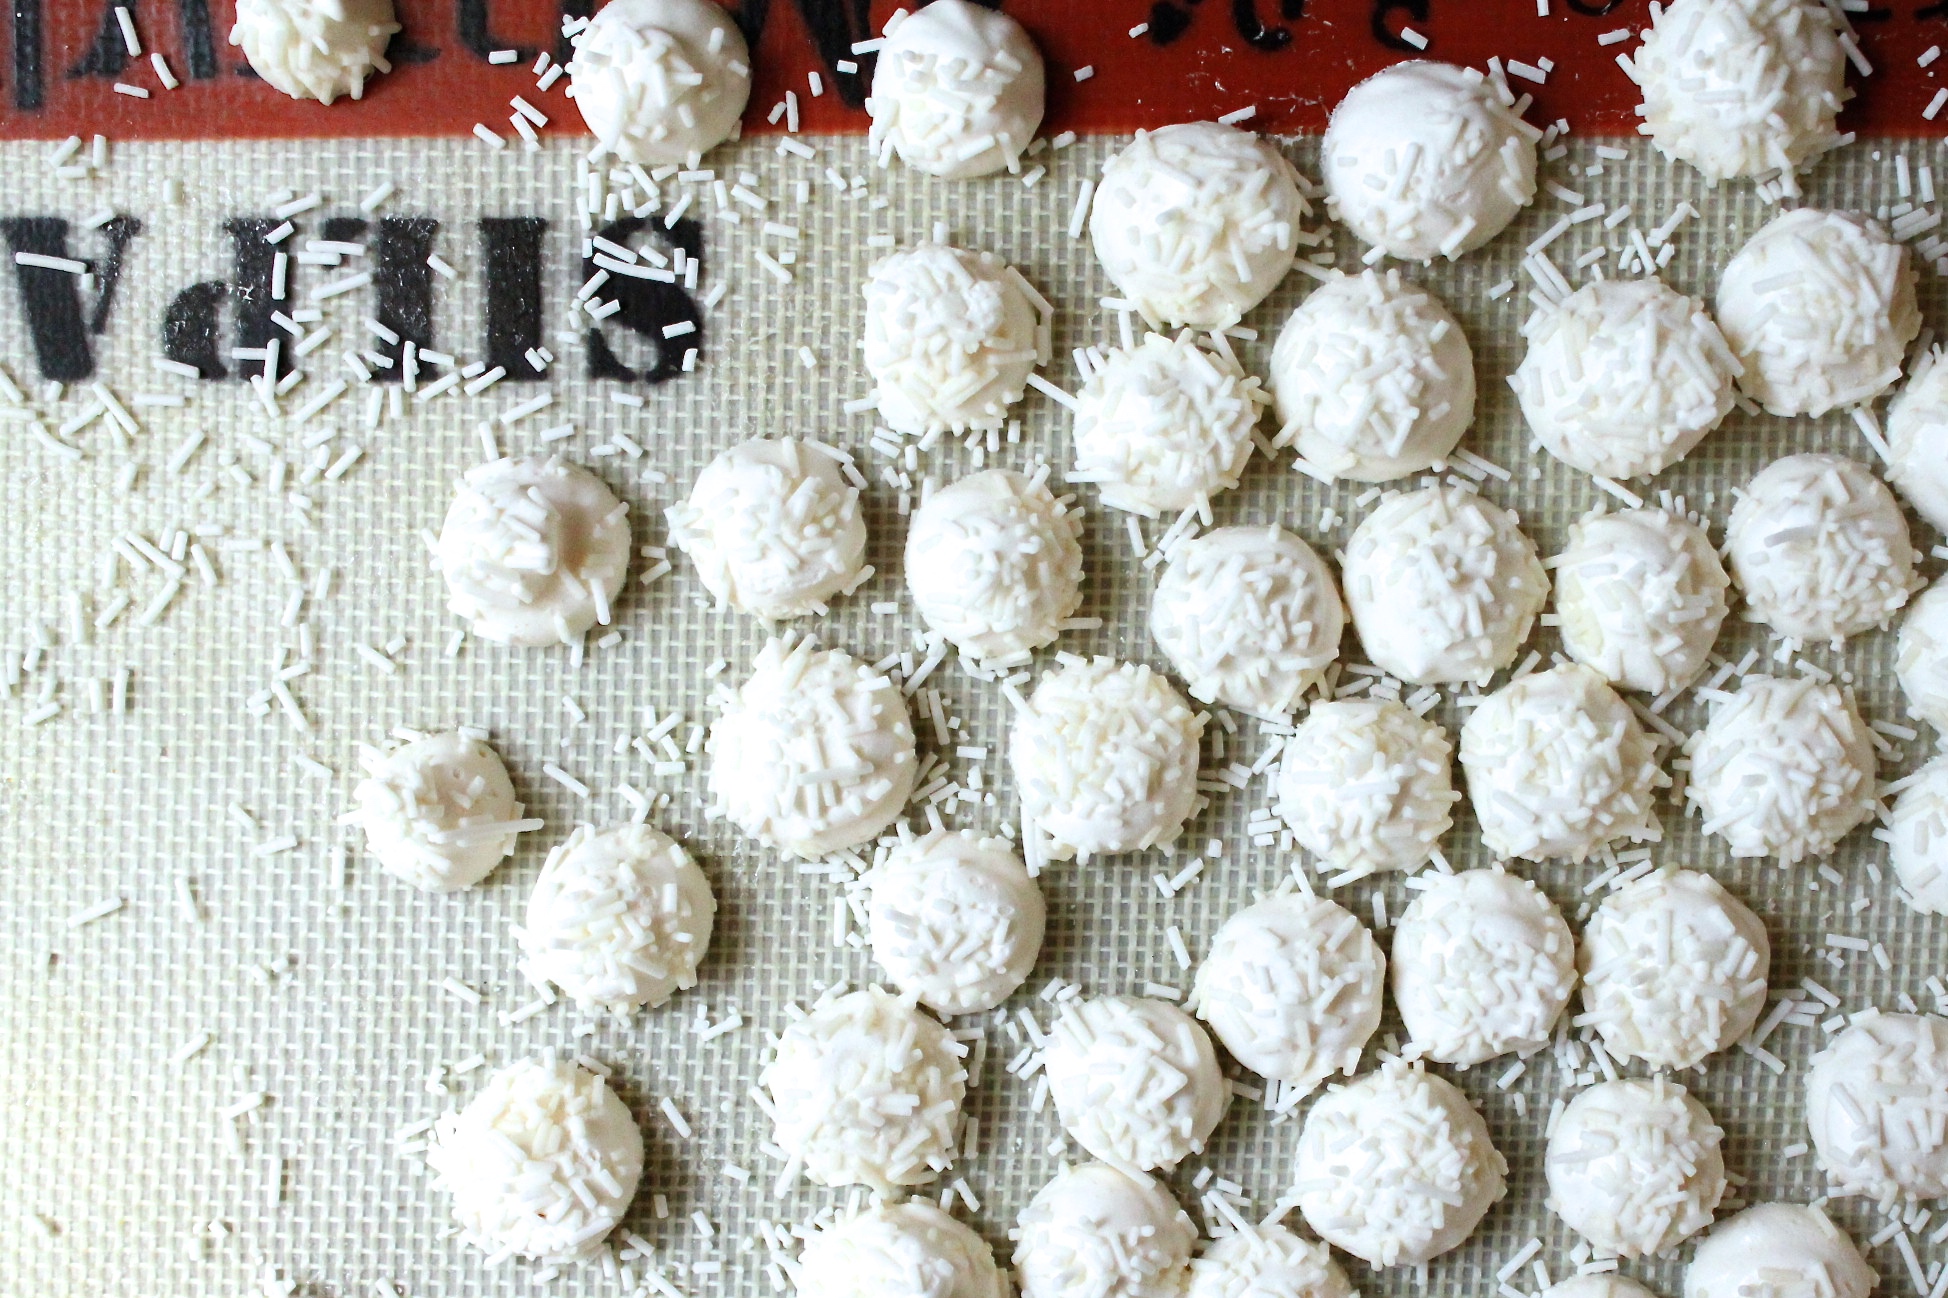
To make the sweet little meringue cottontails for these cookies, I made a tiny batch of crisp meringue kisses, using 1 large egg white, 1/4 cup of sugar, a few drops of lemon juice, and a tiny pinch of salt. Pipe the meringue into small 1/2 inch kisses onto parchment-lined baking sheets, then sprinkle each with white vermicelli before baking at 225°F for about 2 hours (you'll end up with more cottontails than you need--baker's treat!). Cool completely in the turned-off oven for about 30 minutes, with the door cracked open slightly. While the glaze is still a bit damp on the cookies, affix the meringue cottontails by pressing them lightly onto the cookies.
Makes about 10 large (or 24 medium-sized) cookies
2¼ cups (300 g) all-purpose flour 1 cup (110 g) oat flour or whole wheat flour, sifted ½ teaspoon salt 1 cup (230 g) unsalted butter, room temperature 1 cup (205 g) superfine sugar 2 teaspoons pure vanilla extract ½ teaspoon Baker’s Ammonia (see Note) ¼ teaspoon lemon extract 1 large egg 2 recipes Confectioners’ Glaze, in pink (recipe below) Nonpareils, for decorating
In a large bowl, whisk together the flours and salt.
In the bowl of an electric mixer fitted with the paddle attachment, beat the butter and sugar on medium speed until it becomes a pale paste (you don’t want it to be super-fluffy), 2 minutes. In a small bowl, combine the vanilla and Baker’s Ammonia, and then add the mixture to the butter, followed by the lemon extract and the egg. Beat until well incorporated, about 1 minute, scraping the sides of the bowl with a rubber spatula. Reduce the mixer speed to the lowest setting and gradually add the flour mixture, beating until all of the dry ingredients are just incorporated. Do not over-mix. Wrap the dough in plastic wrap, and press it into a large disc. Refrigerate for 1 hour.
Unwrap the chilled dough and put it on a large piece of parchment paper. Put two 1/4-inch wooden dowels on either side of the dough and put another sheet of parchment paper on top. Roll out the dough until it's flush with the dowels (or simply roll the dough to a 1/4-inch thickness--the dowels do make the rolling even more flawless, however). Slide the parchment paper and dough onto a board and refrigerate for 30 minutes or freeze for 15 minutes.
Preheat the oven to 350°F (180°C). Line two baking sheets with silicone baking mats or parchment.
Remove the dough from fridge, cut out shapes using the cutters of your choice, and put them them on prepared baking sheets, about 1½ inches apart. Freeze for another 15 minutes.
Bake until the cookies are starting to turn a light golden color, about 18 minutes. Cookies will puff up in the oven, but will fall back while cooling. Put the baking sheets on wire racks and let cool for 10 minutes. Gently transfer the cookies to the wire racks and let cool completely. (The cookies will keep in an airtight container at room temperature for 1 week, or in freezer for up to 2 months.)
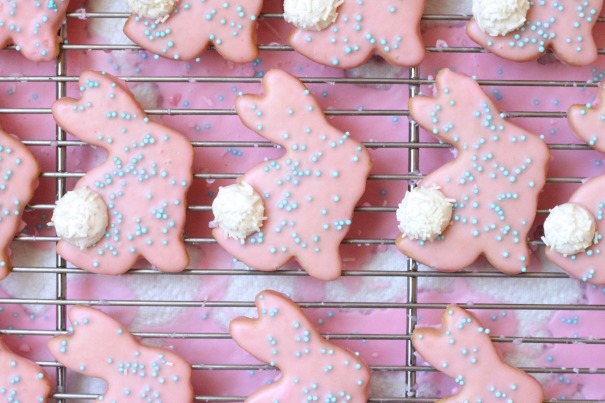
Put a wire cooling rack over a baking sheet. Using a spoon, pour the confectioners’ glaze over each cookie, letting the excess drip onto the baking sheet. Sprinkle with rainbow nonpareils and let dry completely, about 1 hour.
The decorated cookies will keep in an airtight container at room temperature for up to 1 week.
Confectioners’ Glaze
Makes about 1 cup
2½ cups (315 g) confectioners’ sugar, sifted 6 tablespoons (90 ml) milk
In a medium bowl, whisk together the milk and confectioners’ sugar until smooth. Keep covered until ready to use.
Confectioners’ Coating variation: Whisk in 1 ounce (30 g) melted candy coating (aka moulding wafers) to create a shiny, dry coating for your cookies or bars. Choose a colored candy melt to tint your coating, if desired.